Introduction
There are two steps to setting up Okta so that you can use it to log in to CloudAlly:
- Setting up CloudAlly in the Okta application
- Setting up Okta in the CloudAlly application
Setting up CloudAlly in the Okta Application
- In the Okta application, click Applications > Applications > Browse App Catalog.
- In the Search bar, enter CloudAlly.
- Click the triangle next to CloudAlly SAML 2.0, and Assign to Users or to Groups.
- Click CloudAlly SAML 2.0, and on the next page, click the General tab.
- Scroll down until you see the App Embed Link section. Copy the URL that is displayed in the box - you will need this to set up Okta in the CloudAlly app.
Setting Up Okta in the CloudAlly Application
- From the Homepage, click Settings in the Navigation panel.
- On the Settings page, click Security.
- Click the SAML tab.
4. Paste the URL that you copied from the Okta site.
5. Click Activate.
6. Read the text in the next window, and click Confirm.
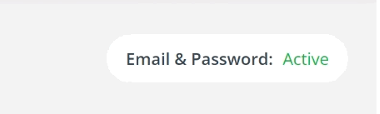
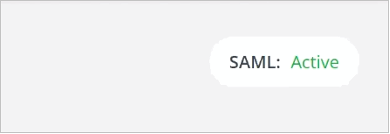
After clicking Confirm, the Active state (top right corner of the screen) changes from Email & Password: Active to
SAML: Active.
Logging in with Single Sign-On (SSO)
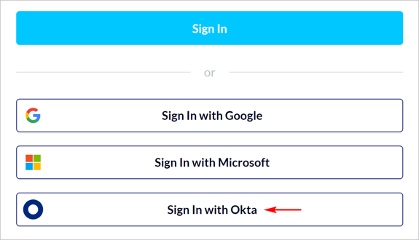
- Go to the CloudAlly login page.
- Click Sign In with Okta.
- Enter your Okta company name.
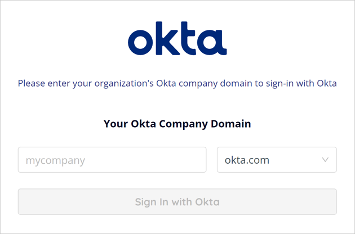
The company domain is taken from your Okta’s URL, for example:
https://{company domain}.okta.com - Enter your Okta credentials.
Note: CloudAlly does not store this information.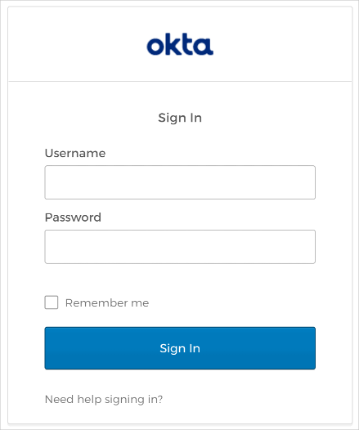
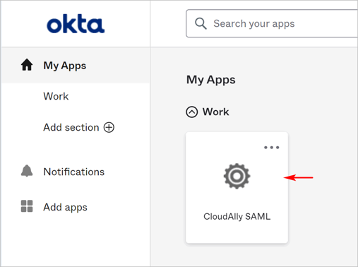
Logging in Via the Okta Dashboard
Alternatively, you can go to Okta user’s homepage and press the CloudAlly application button: